Micro Virtual Machine
Introduction
We present the steps to deploy a micro VM on the TFGrid.
Deployment
Deploy a new virtual machine on the Threefold Grid
- Make sure you have a wallet
- From the sidebar click on Solutions
- Click on Micro Virtual Machine
Process :
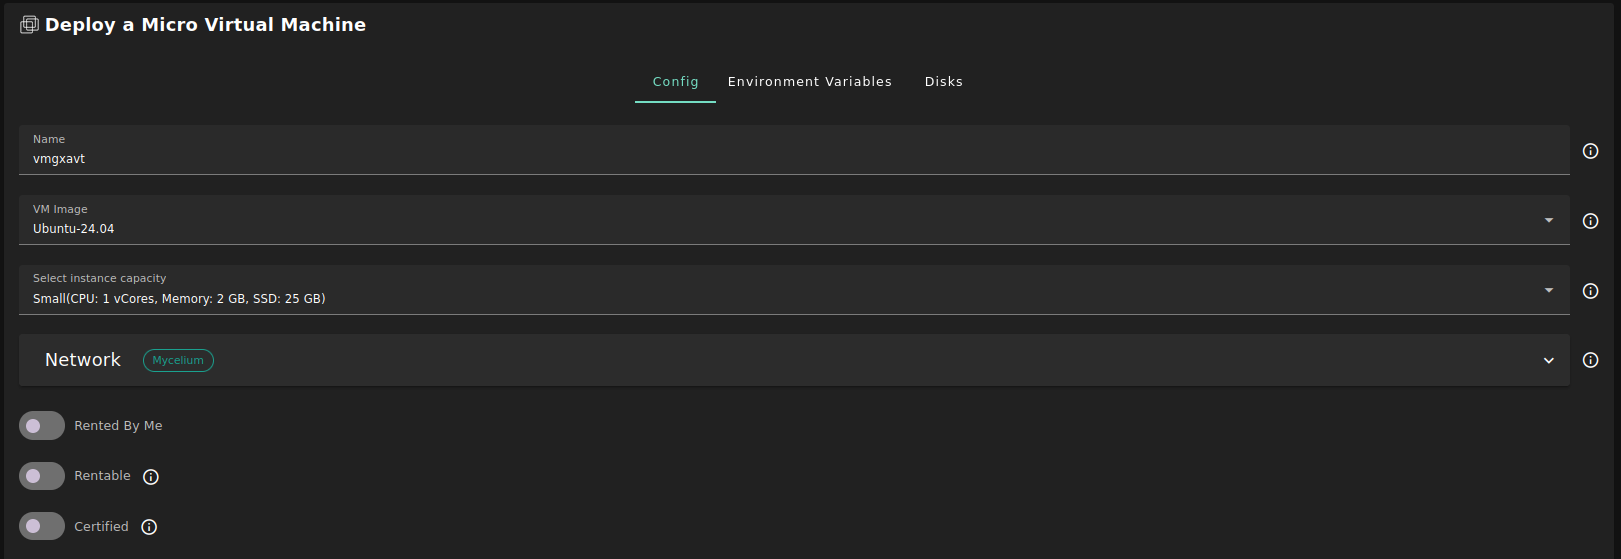
- Fill in the instance name: it's used to reference the VM in the future.
- Choose the image from the drop down (e.g Alpine, Ubuntu) or you can click on
Otherand manually specify the flist URL and the entrypoint. - Select a capacity package:
- Small: {cpu: 1, memory: 2, diskSize: 25 }
- Medium: {cpu: 2, memory: 4, diskSize: 50 }
- Large: {cpu: 4, memory: 16, diskSize: 100}
- Or choose a Custom plan
- Choose the network
Public IPv4flag gives the virtual machine a Public IPv4Public IPv6flag gives the virtual machine a Public IPv6Planetary Networkto connect the Virtual Machine to Planetary networkMyceliumto enable Mycelium on the virtual machineWireguard Accessto add a wireguard acces to the Virtual Machine
GPUflag to add GPU to the Virtual machineRented By Meflag to retrieve nodes currently reserved by youRentableflag to retrieve nodes that can be reserved as dedicated nodesCertifiedflag to retrieve only certified nodes- Choose the location of the node
RegionCountryFarm Name
- Choose the node to deploy the Virtual Machine on
Or you can select a specific node with manual selection.
- In the section
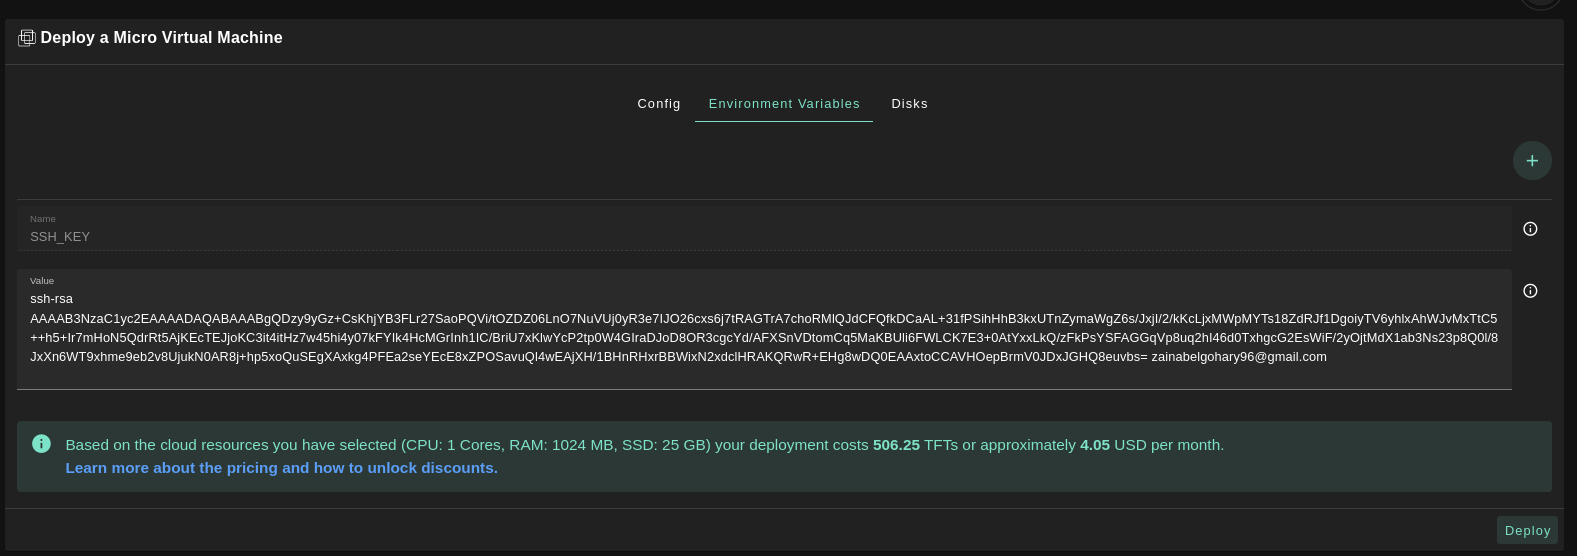
Environment Variables, you can add any environment variables that the machine might need
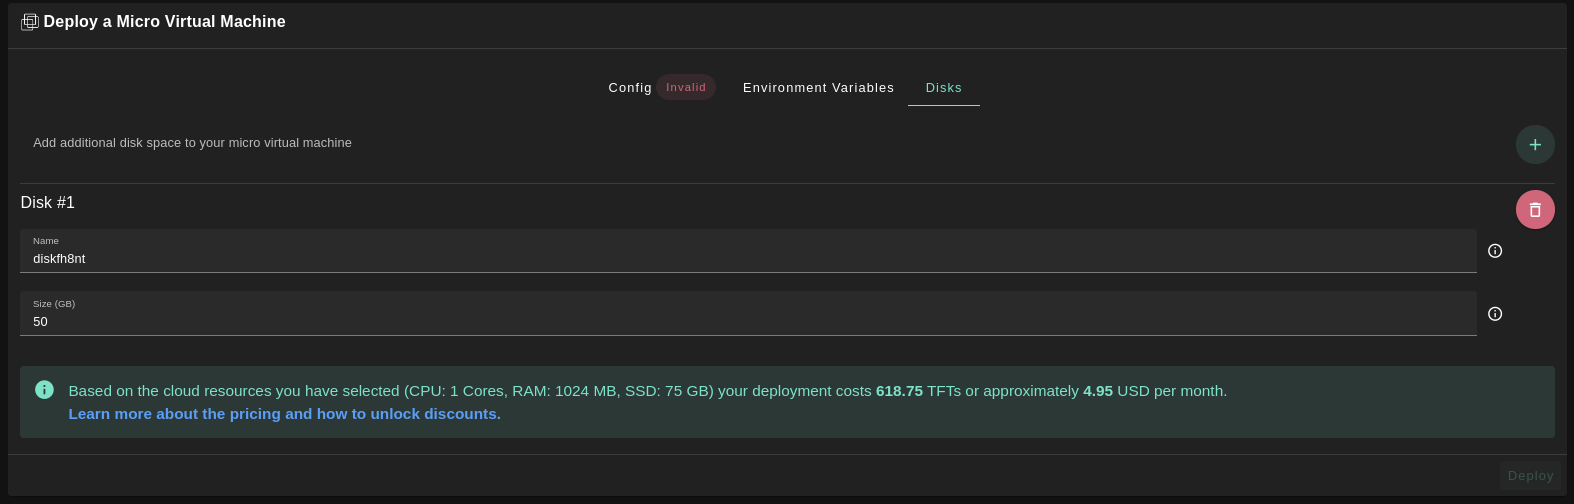
- In the section
Disks, You can attach one or more disks to the Virtual Machine by clicking on the Disks tab and the plus+sign and specify the following parameters- Disk name
- Disk size
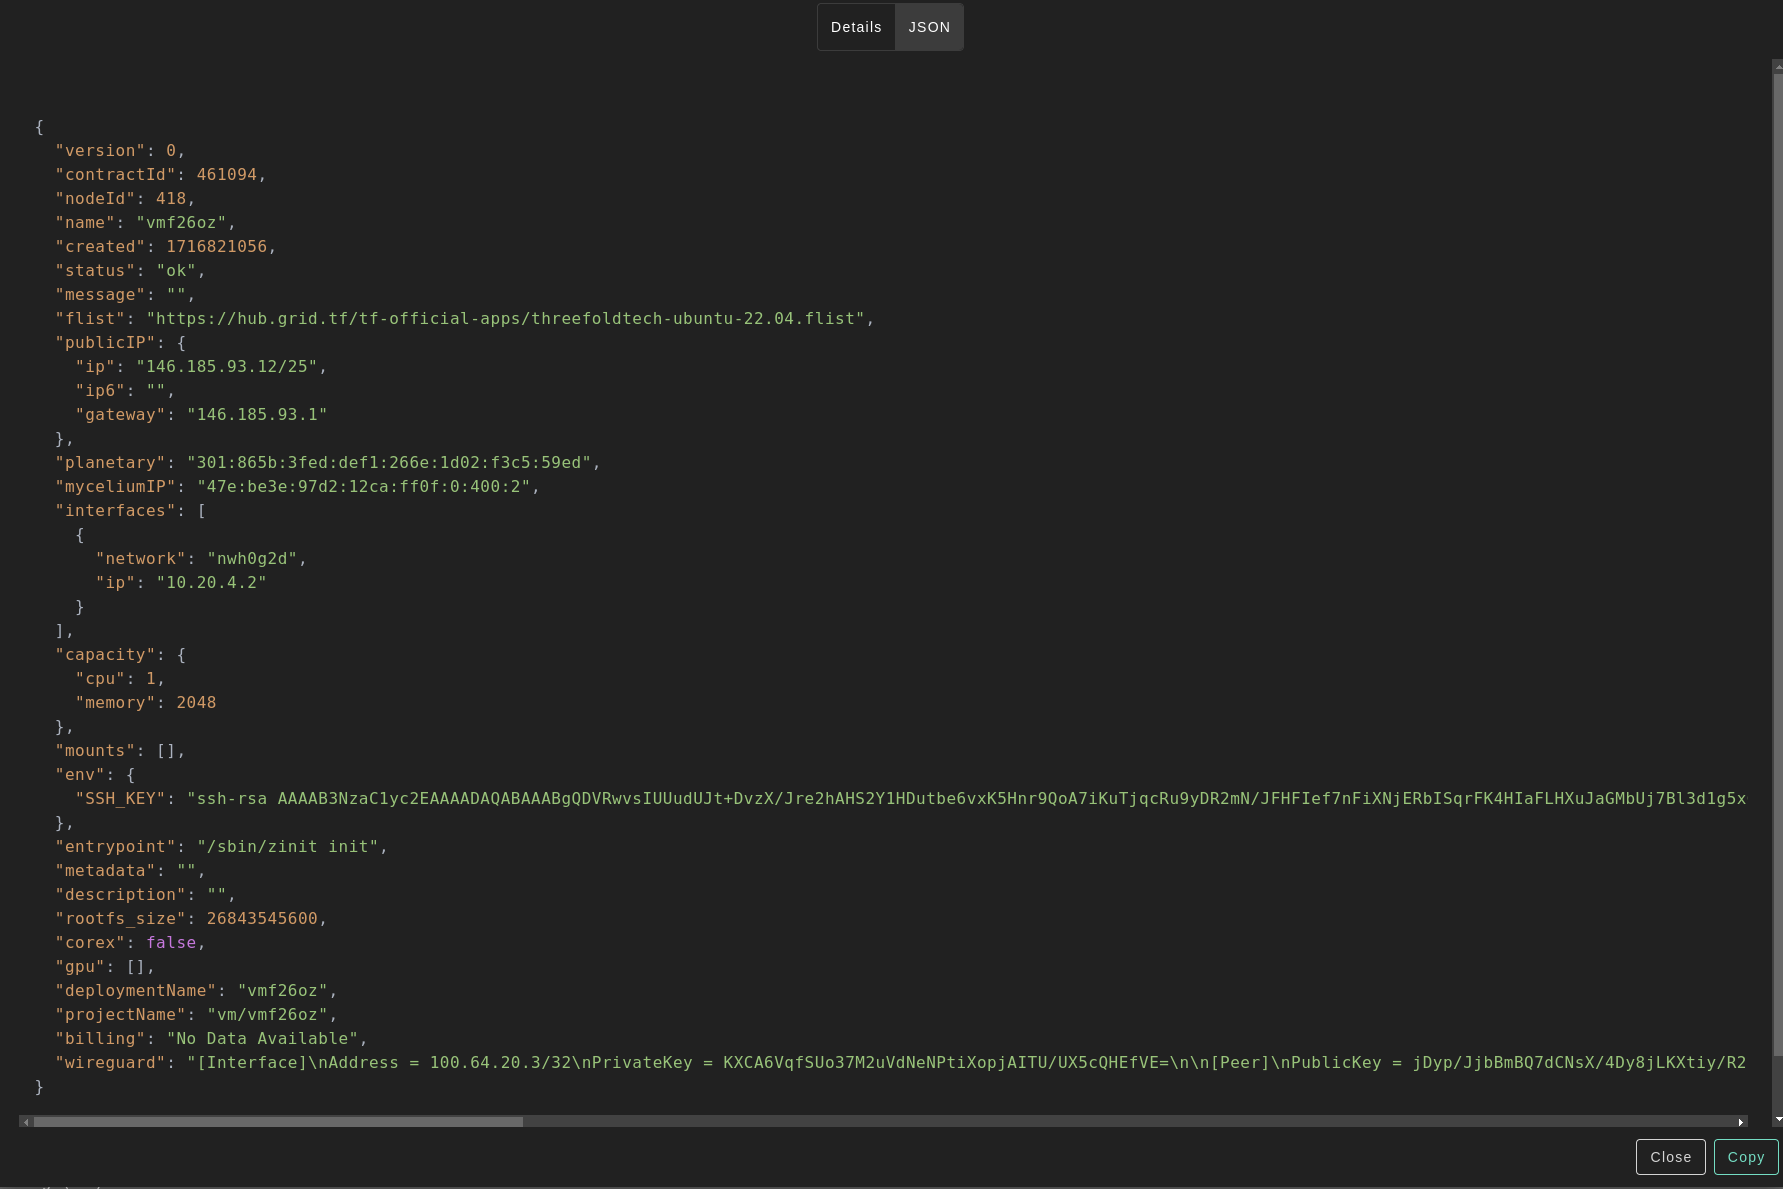
in the bottom of the page you can see a list of all of the virual machines you deployed. you can click on Show details for more details
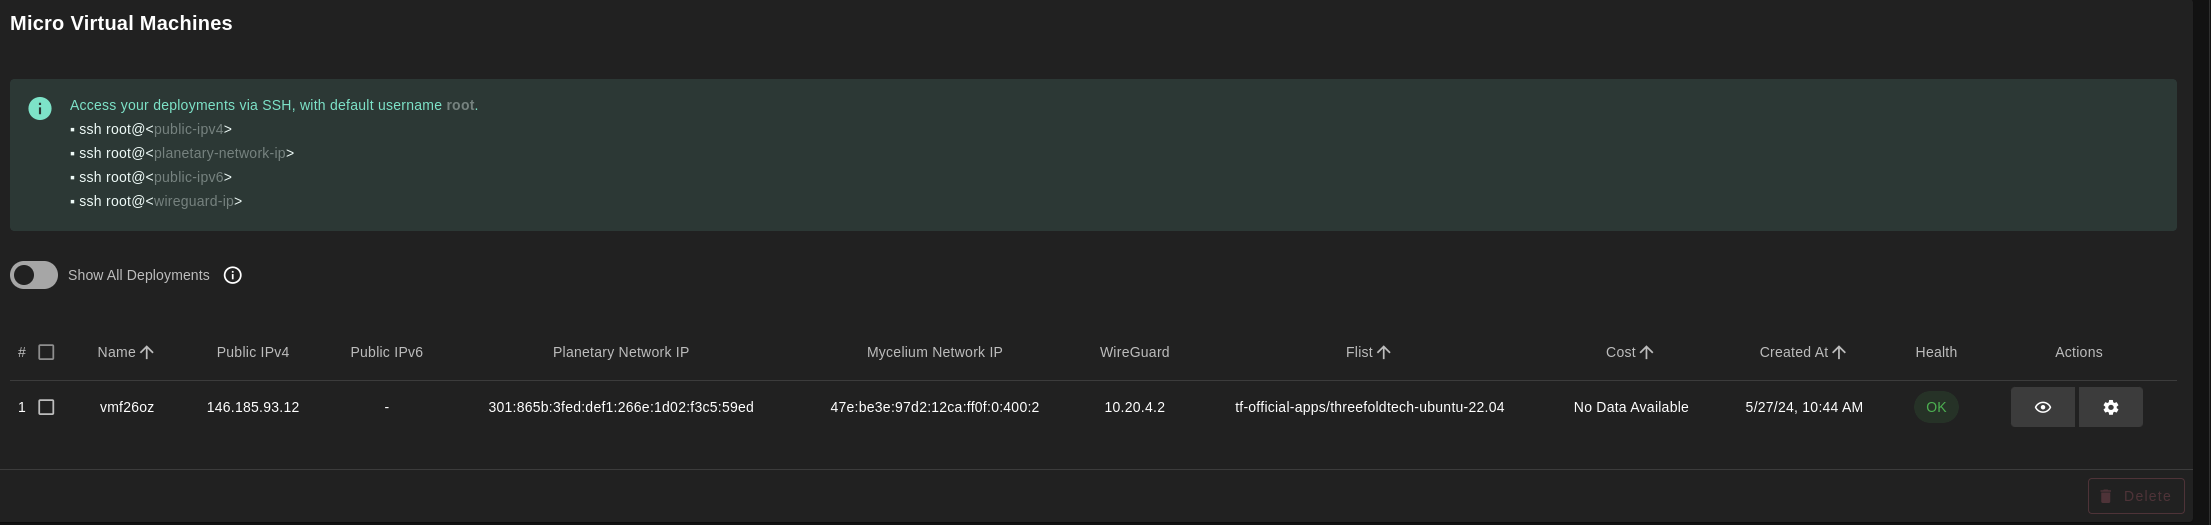
You can also go to JSON tab for full details